Mexican Chimineas

The instructions for this version of the chiminea are below. The chiminea itself is made from a recycled POM juice bottle. The base is made from a recycled aluminum soda can.

This is a chiminea I made about a year ago from the same type of bottle. The base of this one is a juice bottle lid.
 I liked the juice lid because the arches sort of repeat the arch-shaped pomegranate leaves on the POM bottle. The drawback is that the lid doesn't raise the chiminea off the floor as high as I would like.

 I wasn't happy with how wide I made the fireplace opening on this one. Notice that I also cut the top of the bottle differently.


Step one: carefully cut the POM bottle apart between the two rounded sections. I use a thin knife or craft knife the make the initial cut, then use scissors. You can save the bottom section to make a cauldron or large planter.

Step two: cut off the threaded section of the bottle. A dremel tool is idea for this, but a small saw works fine, too. Smooth off the top of the bottle with sandpaper or a nail file, if needed.

You can use an electric tealight for the fire inside the chiminea. You will want to make the opening just wide enough to fit the tealight inside. When cutting the opening, be aware that the curve of the bottle makes it easy to cut too wide. You could also use fairy lights for the fire. Cut a little hole or notch in the back of the chiminea to thread the lights in.

Make a pattern for the door opening on scrap paper and tape it to the front of the chiminea. Be sure to place the opening so the leaf pattern around the neck of the bottle is symmetrical (I forgot to do this.) Cut the opening out with scissors.

Spray paint the inside of the bottle. As you can see from the photo above of the bottle held up to the light, painting the inside does a great job of coverage to block out the light. This will help keep your tealight from shining through the walls of the chiminea when it is lit. (The one spot where light is shining through is where I touched the bottle and accidentally lifted off the paint.)
 I decided I wanted to add some decoration to the front of this chiminea. I used craft foam with an adhesive backing. I covered the chiminea with a base coat of orange acrylic paint. The paint won't want to stick to the plastic, but don't worry. Just brush on a light coat and let it dry thoroughly. When it is completely dry, brush on a second light coat, as shown in the picture above. You can add Mod Podge or Elmer's glue to the acrylic paint to help it adhere to the plastic.
 I decided I wanted to add some decoration to the front of this chiminea. I used craft foam with an adhesive backing.
  This photo shows the chiminea with four layers of paint and Mod Podge. I added a light golden brown paint to the orange to get this color. Paint as many layers as needed for full coverage.


I dry-brushed the chiminea with red-orange paint to accentuate the raised details. Read on for instructions to make the "wrought iron" base. I was inspired by the many examples of soda can pincushions/doll furniture found on Pinterest. A blog called The Busy Bug Life has the best tutorial I could find for how to cut, clamp, and roll a can into 1:6 scale furniture. I highly recommend checking it out as my instructions below are much less detailed. Tin Can Chair Tutorial
 Carefully cut the top off a clean soda can.
 The bottle fits nicely on the bottom of the can.

I like to use some pliers to flatten the can top so I'm not throwing sharp exposed edges into my trash.
 I taped off the top and bottom of the can and marked one inch lines. The can is 8.25" around, so I had eight inches and one-quarter inch left over.

Cut the can into 33 one-quarter inch strips, as shown in the photo and diagram above. Count over six strips, then cut the next two strips in half. Count over six more strips, then cut two more strips in half. In other words, follow the diagram above, and cut the light-colored strips in half. There will be one strip left over; cut it in half.Save the cut pieces to use as clamps.
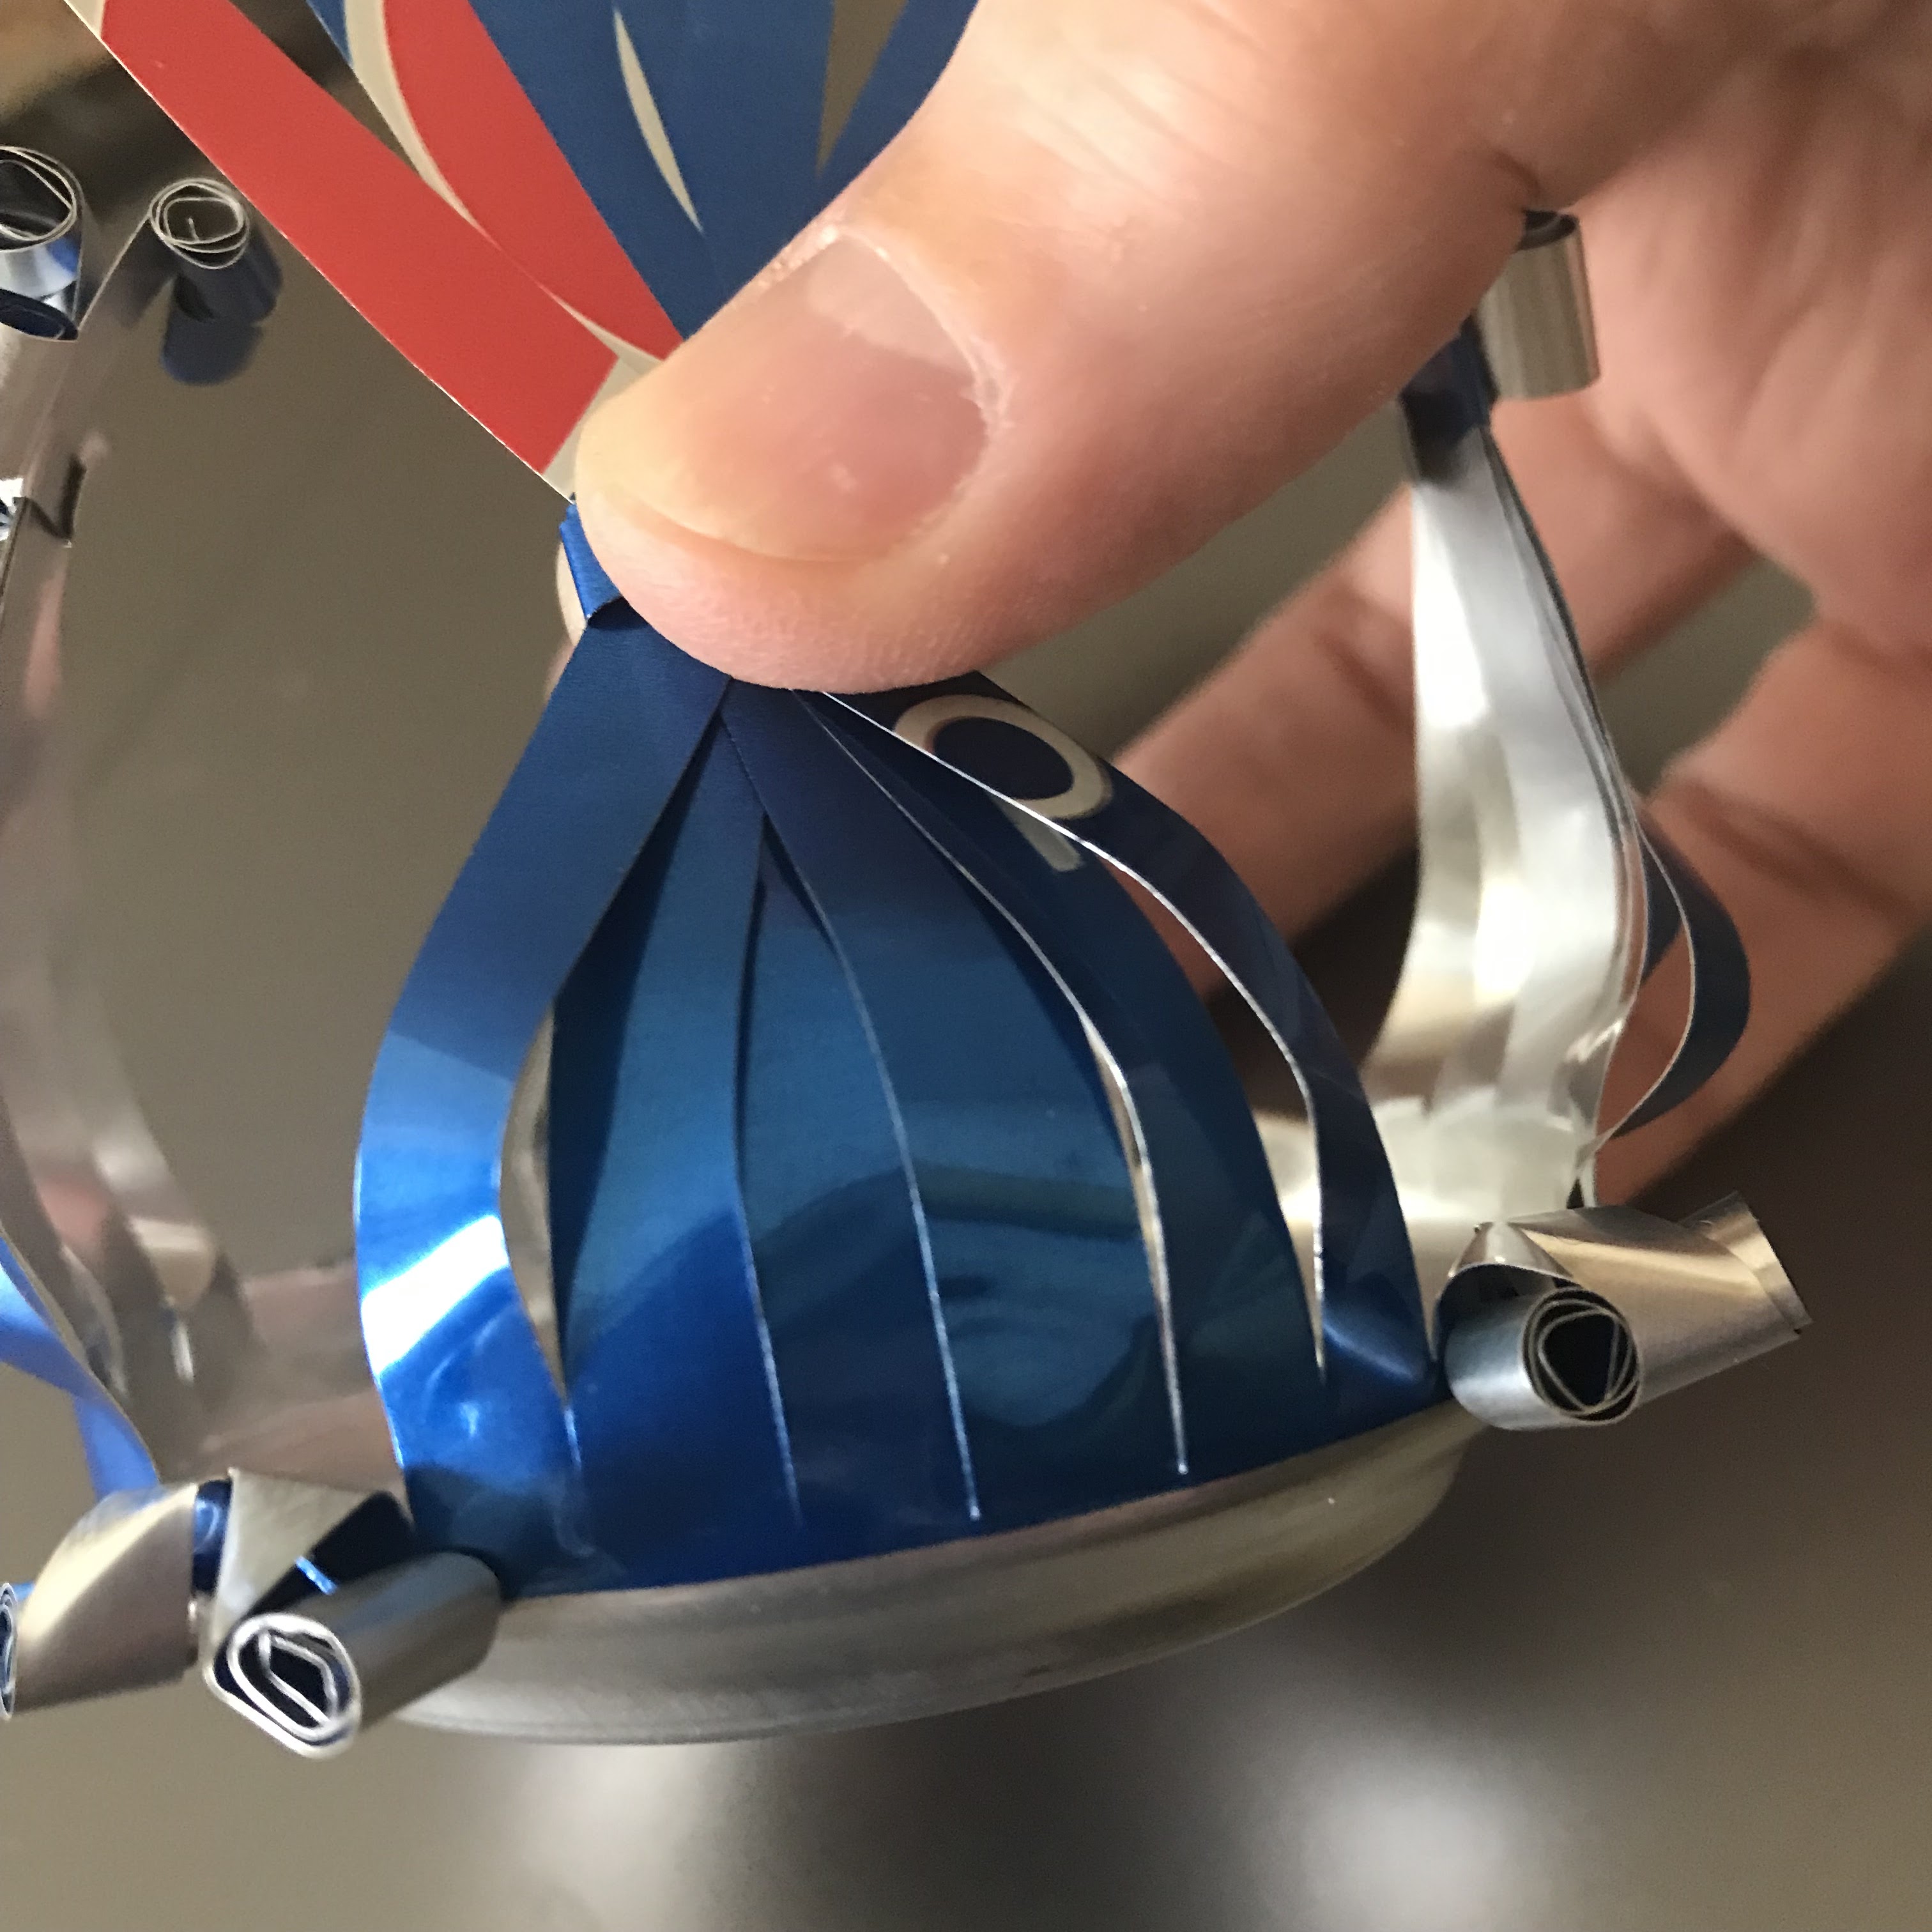
 Gather six long strips together and clamp by wrapping one of the cut pieces around it.
 You can push the clamp up, causing the group of six to bow out slightly. Now roll the strips up to the clamp.


Comments
Post a Comment